CentOs7 nginx 配置HTTPS
Let’s Encrypt是一个免费的证书服务。
官方介绍:让我们加密是一个免费的、自动化的、开放的证书颁发机构(CA),为公众的利益而运行。这是互联网安全研究小组(ISRG)提供的服务。我们为用户提供他们需要的数字证书,以便能够以最方便用户的方式免费为网站启用HTTPS(SSL/TLS)。我们这样做是因为我们想创建一个更安全和隐私尊重的网站。
安装方法:
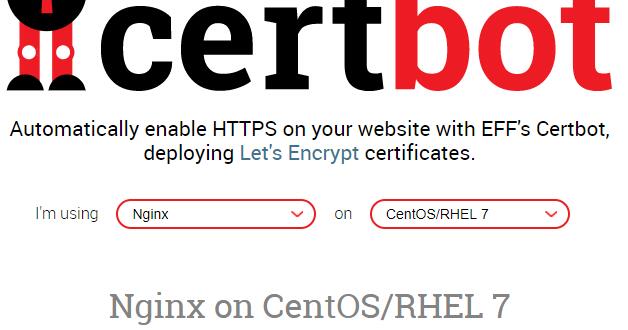
官方推荐的安装方法:通过Certbot的standalone 模式安装 在 https://certbot.eff.org/ 选择合适的web服务器和操作系统版本,我这里选择nginx和centos7
1:安装:EPEL软件源
$ yum -y install epel-release2:安装Certbot的nginx插件
$ yum -y install certbot-nginx
3:获取证书,并使Certbot自动编辑NGNX配置
$ certbot --nginx
我这里报错,提示nginx命令不存在,如果中间提示80端口占用,先关闭nginx服务器,记得以前版本要关闭,这次安装不需要,如果提示ascii问题,看看另外一篇文章,里面有解决方法 Let’s Encrypt HTTPS更新证书问题

找到nginx编译目录,我这里在/usr/local/nginx,运行
$ ln -s /usr/local/nginx/sbin/nginx /usr/bin/nginx
$ ln -s /usr/local/nginx/conf/ /etc/nginx
还是报错,这次提示很明显,nginx缺少SSL模块,当初没有编译

进入nginx目录重新编译
$ ./configure --prefix=/usr/local/nginx --with-http_stub_status_module --with-http_ssl_module然后make
$ make不要继续make install,不然就nginx就覆盖了。
之后会看在当前目录生成objs文件,查看一下
$ ./objs/nginx -V

这里出现了:TLS SNI support enabled ,表示nginx的ssl模块成功安装,但这时候nginx还是用的老版本,先把旧版本备份,执行
$ mv /usr/local/nginx/sbin/nginx /usr/local/nginx/sbin/nginx.old然后添加新版本
$ cp ./objs/nginx /usr/local/nginx/sbin/nginx测试一下
$ /usr/local/nginx/sbin/nginx -t

OK
执行更新
$ make upgrade查看
$ nginx -V现在已经支持了ssl
继续运行上面步骤 3,获取证书

这里提示:输入邮箱,用于联系,输入邮箱,回车
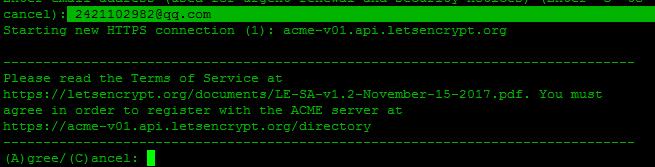
选择A回车同意服务条款,C为拒绝,这里我们选择A,回车继续

您是否愿意分享您的电子邮件地址,建议选择Y回车
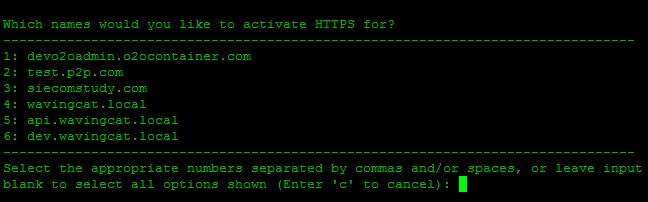
Which names would you like to activate HTTPS for,询问选择哪个域名用HTTP服务,这里我选择1
这里如果提示DNS problem: SERVFAIL looking up CAA for错误,请在域名服务商配置域名解析那里设置一下CAA解析,记录值为:
1 issue letsencrypt.org
然后再重试!
You have an existing certificate that has exactly the same domains or certificate name you requested and isn't close to expiry.
(ref: /etc/letsencrypt/renewal/ychpos.com.conf)

What would you like to do?
-------------------------------------------------------------------------------
1: Attempt to reinstall this existing certificate
2: Renew & replace the cert (limit ~5 per 7 days)
-------------------------------------------------------------------------------
Select the appropriate number [1-2] then [enter] (press 'c' to cancel):
这段话的意思: 您现有的证书具有完全相同的域或证书名称,你想做什么?
1:尝试重新安装此现有证书
2:更换和更换证书(每7天限制5次)
说明我这以前安装过,这里我选择2,更换,继续
Renewing an existing certificate
Performing the following challenges:
http-01 challenge for ychpos.com
Waiting for verification...
Cleaning up challenges
Deploying Certificate to VirtualHost /etc/nginx/nginx.conf

Please choose whether or not to redirect HTTP traffic to HTTPS, removing HTTP access.
-------------------------------------------------------------------------------
1: No redirect - Make no further changes to the webserver configuration.
2: Redirect - Make all requests redirect to secure HTTPS access. Choose this for
new sites, or if you're confident your site works on HTTPS. You can undo this
change by editing your web server's configuration.
-------------------------------------------------------------------------------
Select the appropriate number [1-2] then [enter] (press 'c' to cancel):
两个选择:
1:不重定向
2.重定向-使所有请求重定向到安全的HTTPS访问
选择2继续
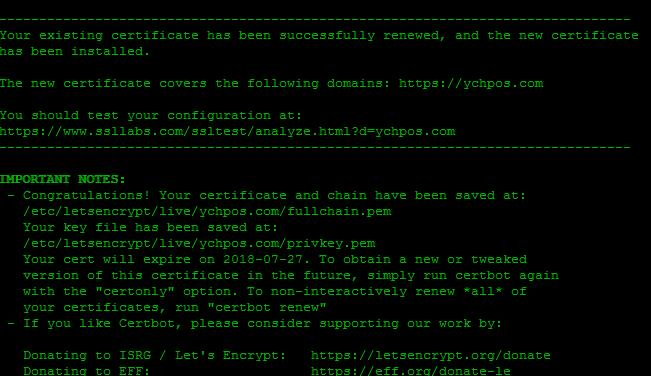
出现这个画面,表示证书安装成功
下面配置nginx
server {
        listen 443 ssl; #开启ssl
        server_name mysql.xxx.com;

	ssl_certificate /etc/letsencrypt/live/xxx.com/fullchain.pem; #SSL 证书文件路径,由证书签发机构提供
        ssl_certificate_key /etc/letsencrypt/live/xxx.com/privkey.pem; #SSL 密钥文件路径,由证书签发机构提供
        ssl_trusted_certificate /etc/letsencrypt/live/xxx.com/chain.pem;

        index index.php index.html index.htm;
        root /usr/local/www/phpMyAdmin;

        location ~ \.php$ {
            fastcgi_pass   127.0.0.1:9000;
            fastcgi_index  index.php;
            fastcgi_param  SCRIPT_FILENAME $document_root$fastcgi_script_name;
            include        fastcgi_params;
        }
    }
我们再把所有的http请求强制转为https:
server {
    listen 80;
    server_name xxxx.com;
    return 301 https://$host$request_uri;
}
重启nginx查看,记得开启443端口。
如果我们要继续添加域名,也可以手动写命令,比如
$ certbot certonly --email 1234567@qq.com --agree-tos --webroot -w /usr/local/www/phpMyAdmin -d mysql.ychpos.com--email:表示邮箱
--agree-tos:表示同意默认
--webroot 项目地址
-d:域名
Saving debug log to /var/log/letsencrypt/letsencrypt.log
Plugins selected: Authenticator webroot, Installer None
Starting new HTTPS connection (1): acme-v01.api.letsencrypt.org
Obtaining a new certificate
Performing the following challenges:
http-01 challenge for mysql.ychpos.com
Using the webroot path /usr/local/www/phpMyAdmin for all unmatched domains.
Waiting for verification...
Cleaning up challenges

IMPORTANT NOTES:
 - Congratulations! Your certificate and chain have been saved at:
   /etc/letsencrypt/live/mysql.ychpos.com/fullchain.pem
   Your key file has been saved at:
   /etc/letsencrypt/live/mysql.ychpos.com/privkey.pem
   Your cert will expire on 2018-07-27. To obtain a new or tweaked
   version of this certificate in the future, simply run certbot
   again. To non-interactively renew *all* of your certificates, run
   "certbot renew"
 - If you like Certbot, please consider supporting our work by:

   Donating to ISRG / Let's Encrypt:   https://letsencrypt.org/donate
   Donating to EFF:                    https://eff.org/donate-le
成功后的画面,然后修改nginx
附录:
certbot certificates #查看证书

certbot delete --cert-name xxxx.com #删除证书

certbot renew --dry-run #更新证书

certbot renew --cert-name xxxx.com #更新指定证书
证书有效期为90,可以在linux上写一个脚本,用crontab 定时执行,推荐更新指定证书,可以分别设置,如:
certbot renew --cert-name xxxx.com
certbot renew --cert-name xxxx1.com
certbot renew --cert-name xxxx2.com
也可以更新所有:certbot renew --dry-run,新版不需要停止nginx
